Refresh Custom Tables
This topic describes how to add a custom table in your Easy Workflow database and use the Refresh option to see the table in the Custom Tables window.
To add a custom table in Easy Workflow database
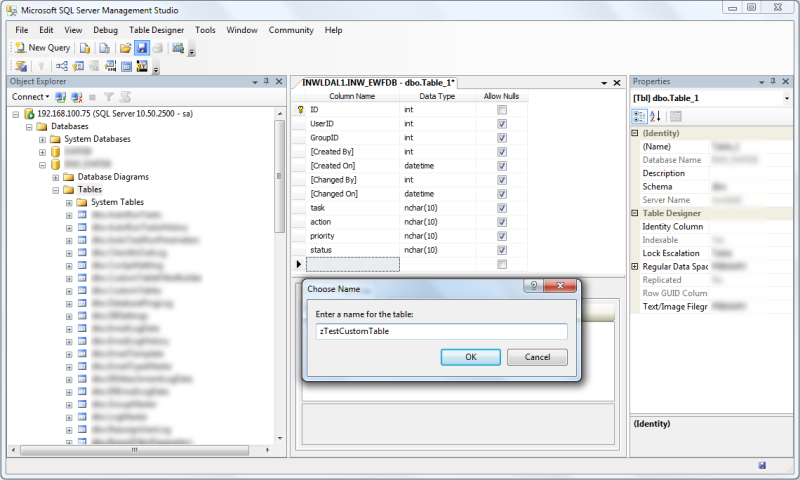
- In SQL Server Management Studio, log on to your Easy Workflow database and create the custom table.
Ensure that the custom table is prefixed with
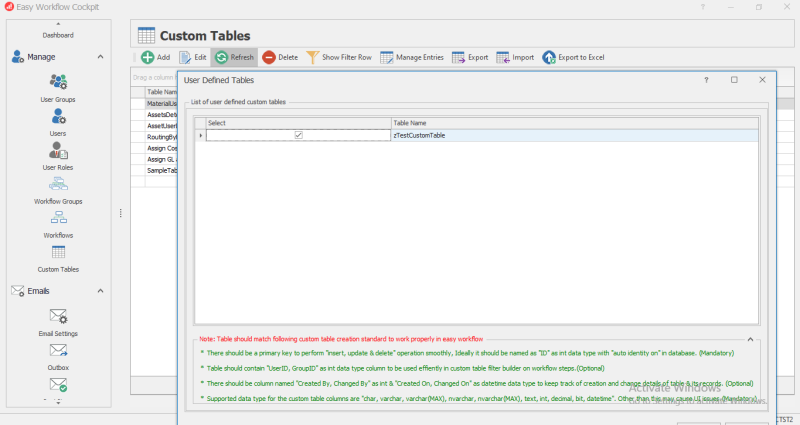
z. For example,zTestCustomTable. - In Easy Workflow Cockpit, select Manage > Custom Tables. The Custom Tables window is displayed.
- Select Refresh. The table you created in step 1 is displayed in the User Defined Tables window.
-
Ensure that you select the primary keys, select Yes, and select Refresh. The table is displayed in the Custom Tables window.
Note: If table does not match the requirement of primary key, a warning message is displayed in the Save Confirmation dialog box as follows.
Primary key is not set for the tables "<NameOfTheTable>". It will cause error while updating and deleting data of these tables. Do you still want to continue?

Related Topics: