Using Other Options
This topic explains the different options available in Others that allows you to perform tasks, such as refreshing the rights assigned to you in Easy Workflow Cockpit or creating a shared SAP logon shortcut.
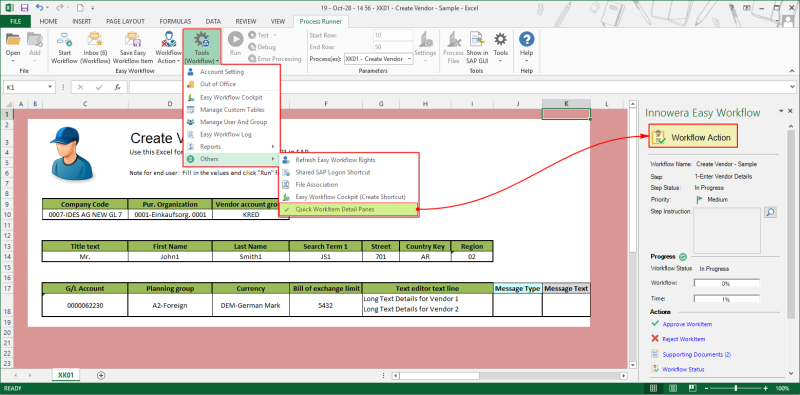
To use the options in Others, select Tools (Workflow) > Others, and select one of the following options:
- Refresh
- User Rights: Indicates that your Easy Workflow rights, which are set in Easy Workflow Cockpit, will be refreshed.
- Inbox Count: Indicates that the count of the work items in your Inbox will be refreshed.
Note: Alternatively, to refresh the user rights or Inbox count, you can close Excel, and then open a new Excel instance.
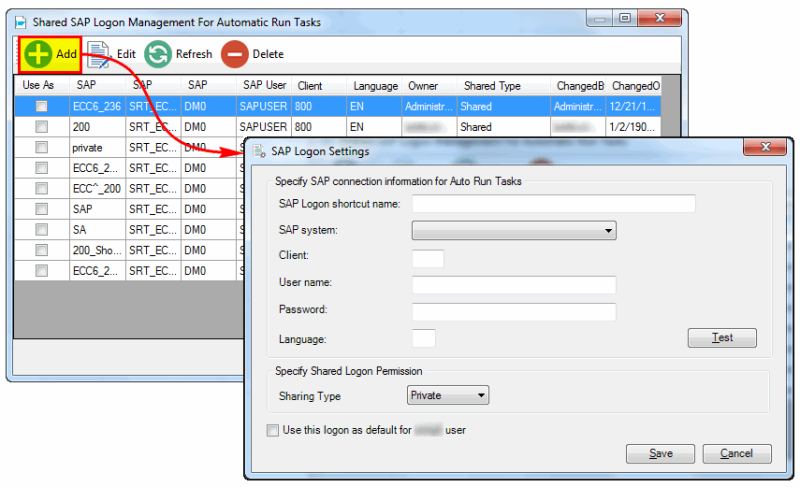
- Shared SAP Logon Shortcut: Allows you to create SAP logon shortcut that can be used in autorun step types. Perform the following steps:
- Enter the following SAP logon details. The SAP connection details provided should be available in the
saplogon.inifile that is on the computer where the service is running.- SAP Logon shortcut name: Indicates the name for the SAP logon.
- SAP System: Indicates the SAP system for which the logon shortcut must be created.
- Client: Indicates the SAP client that is used to log on to the SAP system.
- User name: Indicates the user name that will be used to log on to the SAP system.
- Password: Indicates the password corresponding to the user name.
- Language: Indicates the logon language.
- Sharing Type: Indicates if the logon shortcut can be used by other users.
- Click Save. The logon shortcut is created.
- Enter the following SAP logon details. The SAP connection details provided should be available in the
- File association: Indicates that the work item received in the email attachment is always opened using Innowera Assistant.
- Easy Workflow Cockpit (Create Shortcut): Allows you to create a shortcut on the desktop that you can use to open Easy Workflow Cockpit.
- Quick WorkItem Details Pane: Displays the details about the current work item, such as the file name, workflow name, and step status. Note that if you have customized the label for Approve and Reject for the workflow step, then that label appears instead of Approve and Reject. For information about how to customize the labels, see Configure Step Settings.
Related Topics: