Note that it cannot record mouse scrolling, drag and drop. F4 (selection drop down) and few other activities. Page up down is usually recorded correctly.
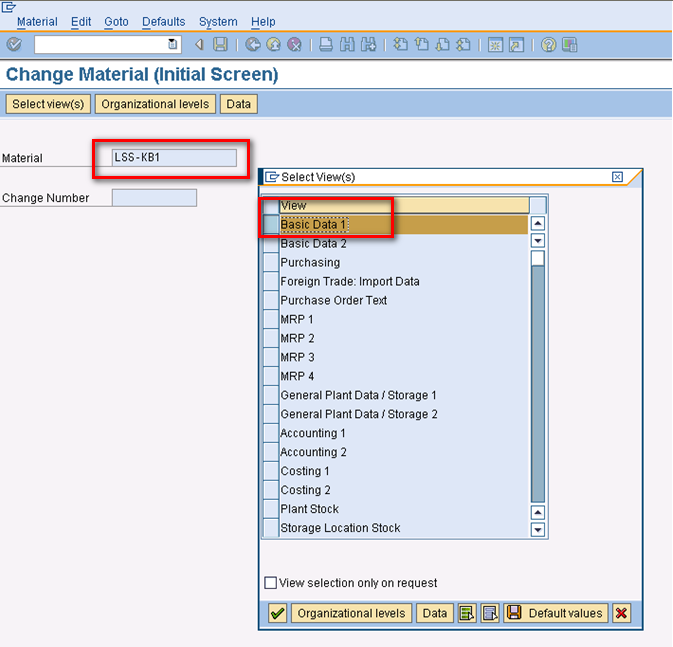
To continue our example, enter a sample material. For our example, take the first material from the iTable and type in Material field. Hit enter. On “Select views” dialog, Select Basic Data view and hit enter.
Hints:
1.SAP GUI displays “Recording running.. “ at bottom left corner of the screen as you execute the transaction. You will see this progress bar throughout you execution of the transaction.
![]()
2.It is important not to make any mistake while executing recording, as Process Runner DB will run this transaction exactly the way you record. For this reason, In case of any mistake, exit out of the transactions and restart the recording from “New Wizard” again.
3.The best practice is to check transaction and test data in target system, before you start recording. This will ensure that your recording of the test transaction will go without any issue.
Continuing our example: Once we are in Basic Data1 view in material master, change Gross and Net Weights as per our iTable and hit "Save" button.

Once you have saved the changes and finished the transaction, the SAP GUI session will be ended and you will come back to Process Runner DB.
Hint: While most transaction ends when you press “Save” button, you have to exit out of the few other transactions by pressing back arrow key (F3). Control does not go back to Process Runner DB until you exit out of the transaction completely.
This ends 2nd step of recording a sample transaction. SAP GUI should have been closed and you should be back to final file creation step in Process Runner DB Wizard.
Next:
Step 3- Save to File