Add or Edit Users
This topic describes how to add or edit a user in Easy Workflow Cockpit. You can add one user or multiple users from your Active Directory simultaneously to Easy Workflow.
To add a single user or multiple users or edit a user
- In Easy Workflow Cockpit, select Manage > Users. The Users window is displayed.
- Select Add. The Single and Multiple options are displayed.
- To add one user at a time, select Single. The Manage User window is displayed.
- To add multiple users from your Active Directory simultaneously, select Multiple. The Add Multiple User window is displayed.
- Enter domain name in the Domain box.
- Depending upon whether you want to search by a user or user group, select User or Group in Search In box.
- If you have selected User, perform the following steps:
- If you are searching for a specific user, enter the name of the user, and then select Search. The Windows Credentials window is displayed.
- Enter your domain credentials, which is retained until you select Close in the Add Multiple User window, and select OK. The user is displayed.
Note: If you have not entered the name of the user, but selected Search, an alert is displayed to let you know that fetching all the users from Active Directory will take time.
- If you have selected Group, perform the following steps if you know the name of the group:
- Enter the name of the group in the box, and then select Search. The Windows Credentials window is displayed.
- Enter your domain credentials, which is retained until you select Close in the Add Multiple User window, and select OK. The users in the user group are displayed.
- If you have selected Group, perform the following steps if you do not know the name of the group:
- Select Search. The Windows Credentials window is displayed.
- Enter your domain credentials, which is retained until you select Close in the Add Multiple User window, and select OK. The user groups available in your Active Directory are displayed.
- Select the group from the dropdown menu, and select Search. The users in the user group are displayed.
- Select the users you want to add, and optionally update the default user group and user role of the user.
- Select Add, and select Yes in the Information dialog box. The Users page is displayed with the users added.
Note: You can edit the details for each user in the Manage User window.
- On the User Details tab, perform the following steps.
- To make the user inactive, clear Active. By default, this option is selected if the number of users that you have added does not exceed the number of valid licenses.
- If you have not added the user from your Active Directory, in Windows User Id, enter the Windows domain user name of the Process Runner Excel Add-in user who can work with the workflow items and log on to Easy Workflow Cockpit. Optionally, select the Validate User ID icon to check if the user name exists in the current Active Directory domain service.
- If you have not added the user from your Active Directory, in Display Name, enter the display name for the user.
- If you do not want the user to enter the password to log in to Easy Workflow Cockpit, select Do not ask password for Cockpit.
- In Email ID, enter the user's email ID for the notifications and in Alternative Email ID, enter the alternative email address that will be used for two-factor validation.
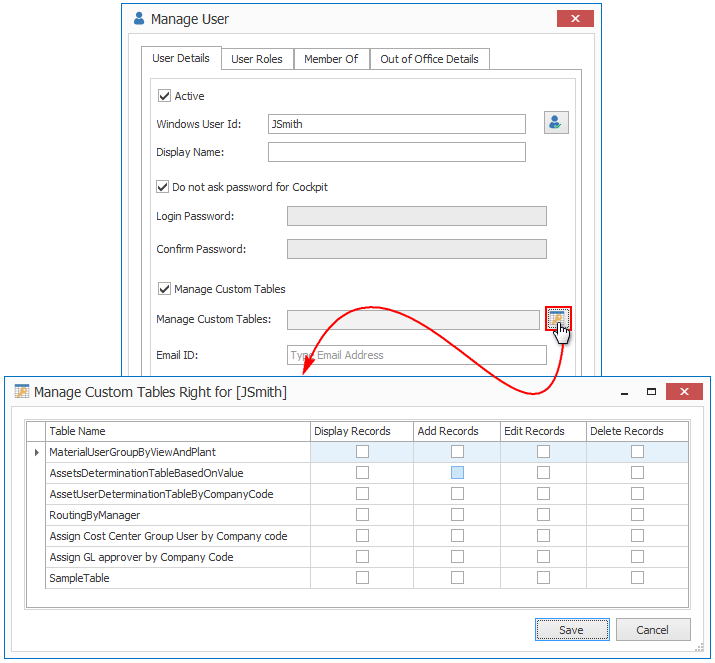
- Select Can Manage Custom Tables and select the tables that the user can manage in the Manage Custom Tables Right for [WindowsUserID] window.
- Optionally, select Do not send emails to me. The user will not receive any mails related to workflow.
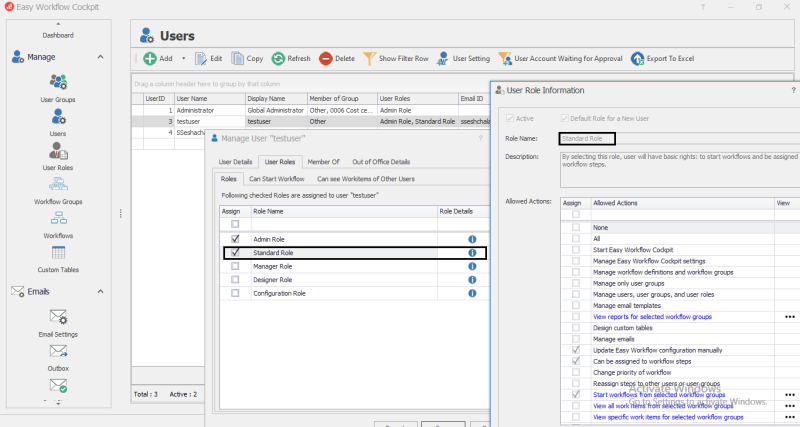
- On the User Roles tab, perform the following steps.
- On the Roles tab, select the role that must be assigned to the user and optionally select the info icon in the Role Details column to view the role details.
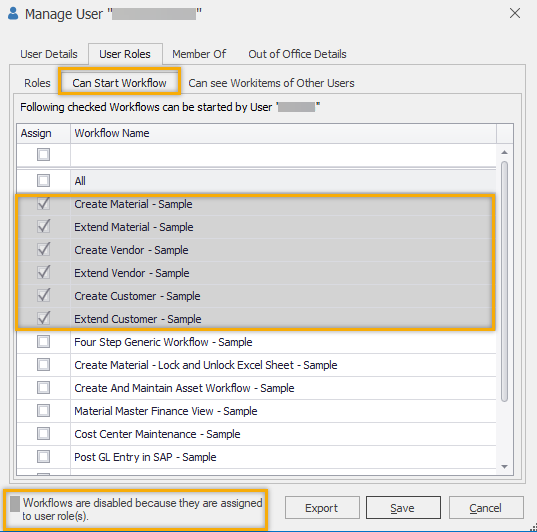
- On the Can start Workflow tab, select the workflows that the user can start. You cannot disable the workflows that are already assigned based on the user's user role. However, you can assign additional workflows specifically for the user.
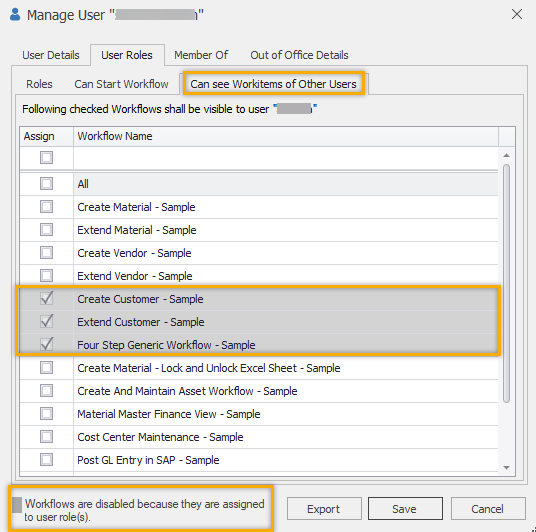
- On the Can see Workitems of Other Users tab, select the workflows whose workflow items will be visible to the user. You cannot disable the workflows that are already assigned based on the user's user role. However, you can assign additional workflows specifically for the user.
Note: You can use the Export option available on the Roles, Can Start Workflow, and Can see Workitems of Other Users tabs to export the role and workflow details of the user to an Excel workbook.
- On the Member Of tab, select the user groups that the user must be part of.
Note: You can use the Export option to export the user group details of the user to an Excel workbook.
- On the Out of Office Details tab, perform the following steps:
- If you are not certain when the user will be back in office, select Activate Out of Office. The options under the Out of Office Details tab are enabled.
- If you have the information about the period during which the user will be out of office, select Set Out of Office Time Period, and then specify the From Date and To Date values.
- In Substitute User, select the substitute user who will be responsible for the workflow-related activities during the user's absence.
- In Send Email to Substitute User section, depending upon your requirement, select the following options:
- When I'm the only user on the step: Indicates that an email is sent to the substitute user when the out-of-office user is the only user who is assigned a workflow step.
- When I'm part of the group on the step: Indicates that an email is sent to the substitute user when the out-of-office user is part of a group that is assigned a workflow step.
- If you do not want the out-of-office user to receive email notifications when he is out of office, select Disable email notification during Out of Office.
- Optionally, in the Internal Note box, type the message that will be displayed only to the Easy Workflow Administrator or to any user who has the Can manage Users, User Groups and User Roles option selected in their user role.
Note: If you select this option without selecting Set Out of Office Time Period, then the out-of-office user will not get any email notifications until you manually clear the Activate Out of Office option. However, if you have specified the out-of-office period, then the out-of-office user will start getting the email notifications after the period has elapsed.
- Select Save. The user is added.
- Optionally, select Refresh. The list of users is refreshed.


Related Topics: