How to manually add screen and fields in Mapper


How to manually add screen and fields in Mapper |
|
|
Mapper displays what has been done in recording. When the recording process is complete and a requirement arises to add a field/screen in Mapper, the user doesn't have to repeat the entire recording process. These fields/screen can be manually added in Mapper.
One or more fields can be added into Mapper by activating them. In some cases where fields are not available in the Mapper and the screen also has to be added then user can manually add fields/screen using their technical information.
A.Activate fields
Fields can be activated using 'Select Fields' option in the toolbar. 'Advance View' in Mapper tab also allows user to add the fields. Please refer the section below on activating fields using Select Fields or Advanced View option.
'Select Fields' option:
1.Open the process file.
2.Click on the 'Select Fields' button in the toolbar.
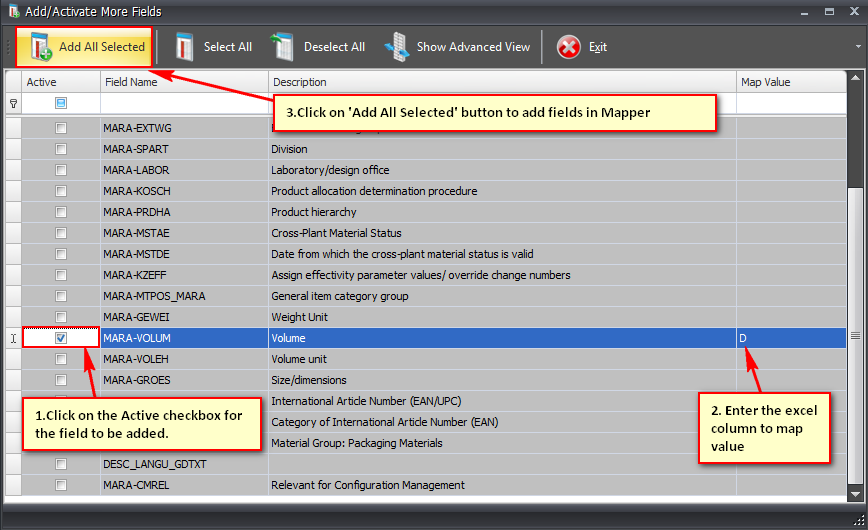
3.'Add/Activate More Fields' window is displayed with 'Active' checkbox for the fields.
4.Select the field which is to be added and check the 'Active' checkbox.
5.Enter the excel column to be mapped under the 'Map Value' column.
6.Click on 'Add All Selected' button to successfully add the field in Mapper.
'Advanced View' option:
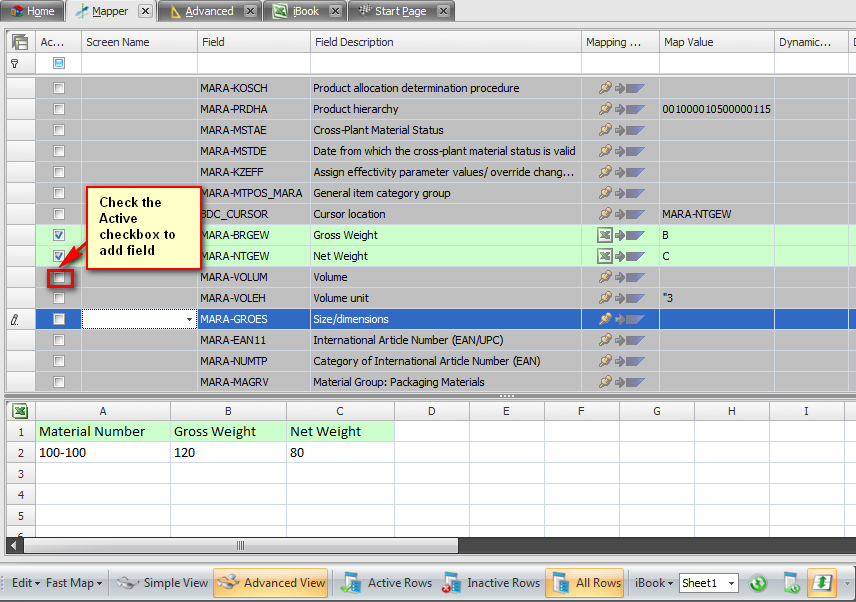
1. In the Mapper tab, click on 'Advanced View' and select 'All Rows' which displays all rows and columns.
2.Search for the field and click on the 'Active' checkbox to add the field.
B.Addition of screen and fields using technical information
In case if the field is not present in the previous option, user has to manually find the technical name of the SAP field/Screen name and add it in the mapper. In some cases user may have to add the screen as well. This can be achieved in Mapper using Copy and Paste option or by using Clone option. Both will result in addition of duplicate rows which user can use to update the missing field/screen information.
1.Copy & Paste option
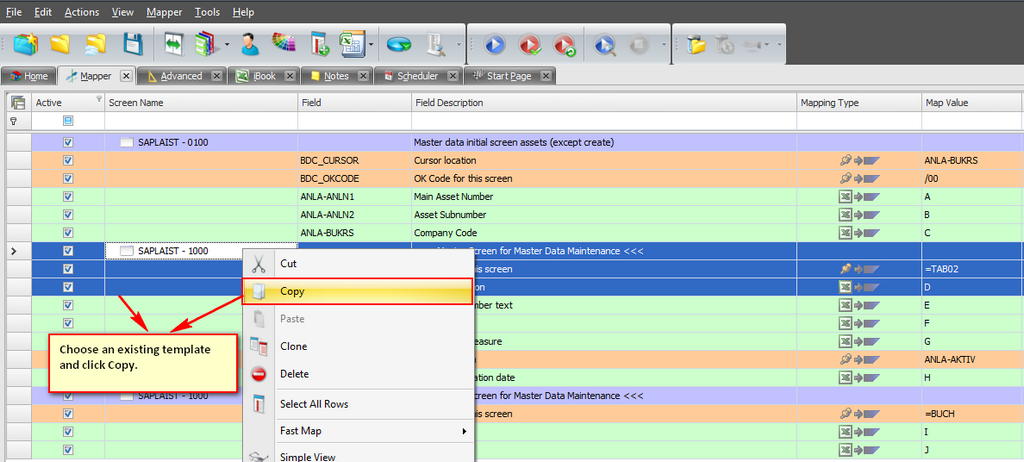
a.Identify where to insert the screen and field in Mapper for the correct screen flow. b.Select an existing template. c.Right click on the selection and click on Copy.
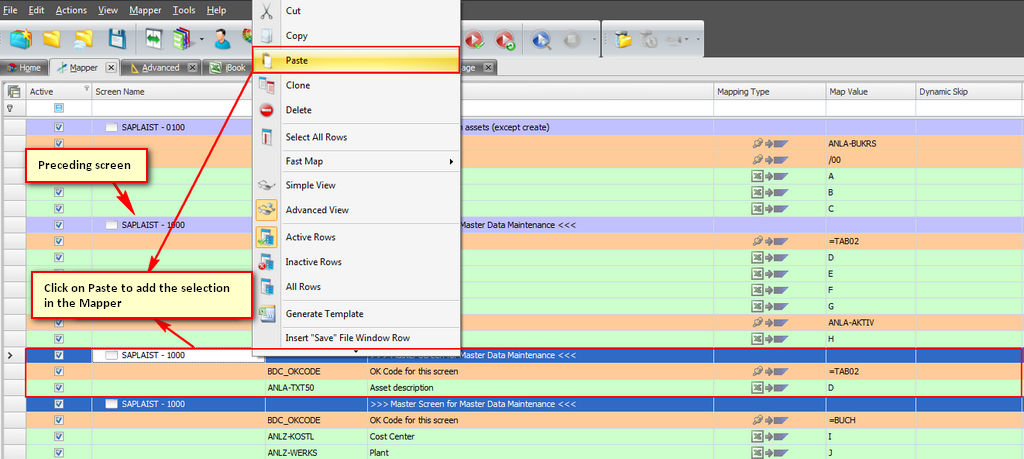
d.Paste it below the preceding screen.
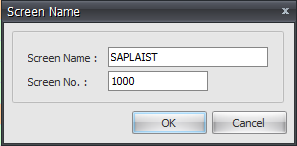
e.Double click on the screen name and enter the screen name, screen number found in technical information of the field.
f.Find out the OK_CODE to go to the next screen and enter the code in the BDC_OKCODE field value in the Mapper.
g.Update the technical name for the field, change its description, select appropriate mapping type and change its Map value.
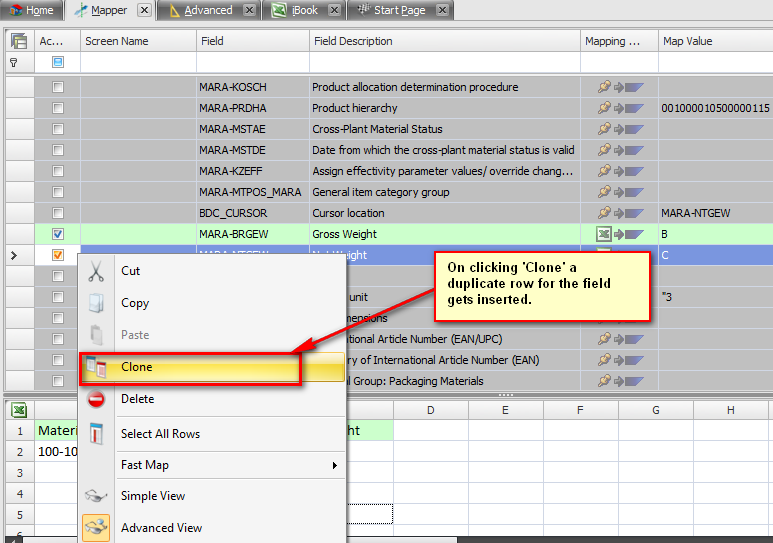
2.Clone option
a.Identify the screen name in which the field needs to be added. b.Right click on any row. c.Click on 'Clone' option.
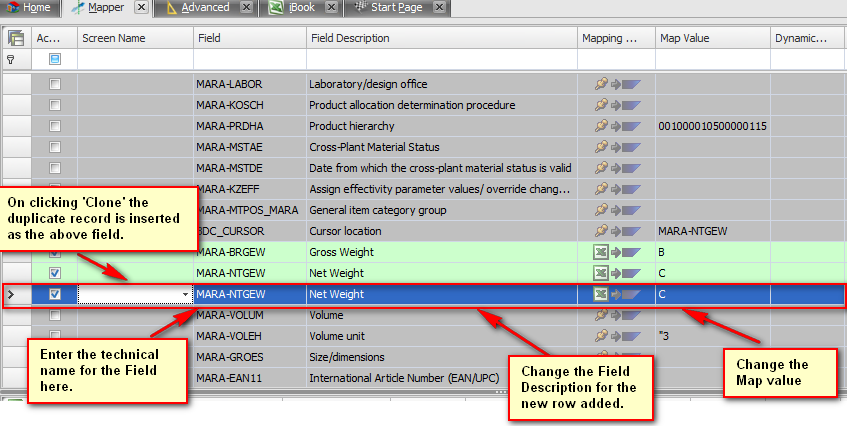
d.A duplicate record gets inserted right below the row selected.
e.Enter the technical name for the field used in SAP under 'Field' column. Please make sure if a screen is added,then change its screen name and screen number. f.Enter 'Field description' which is user specific. g.Choose the required Mapping type and change the Map value.
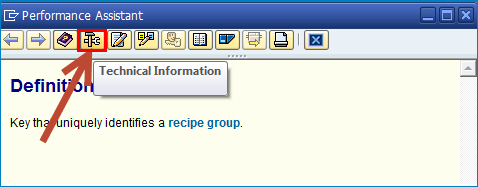
Note: To find the technical name of the SAP field, Screen name & number, press F1 with cursor on the field inside the transaction.
Next: How to resolve *.0 value while downloading data from SAP |