We can create a Dynamic Table Join from more than one SAP table using Process Runner. This can be done by utilizing the Join Condition Feature which uses a custom data extraction remote function module. For the context of this, let us walk through a simple example of a Dynamic Table join between three SAP tables. An extraction of three SAP Tables can also be done by creating a pseudo join which is explained here.
Scenario
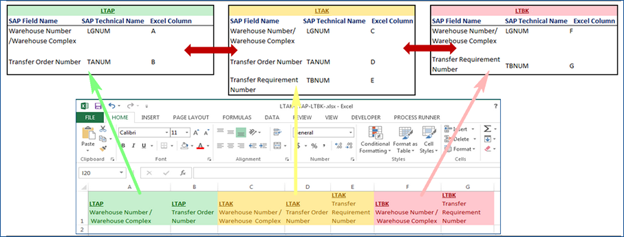
Create a join between SAP tables LTAP, LTAK and LTBK into a single excel worksheet named LTAK-LTAP-LTBK.xlsx using Extended RFM/Join Condition. The requirement is to extract Warehouse Number/Warehouse Complex, Transfer Order Number and Transfer Requirement Number and other information.
Concept
SAP tends to save the data in tables. Each type of data are saved in different table. These data are extracted from SAP tables through Data Extractor technology in Process Runner. Dynamic Table Join feature in Process Runner is used for extracting data from multiple tables in a single run through a single process file.
Innowera Process Runner Data Extractor (DE) module extracts data from tables or views using SAP provided standard remote function module (RFM). This RFM provides basic but sufficient data extraction capabilities in most cases while some limitations resist extensive implementation of the same. There are other business requirements and optimization which are required at user-end.
Innowera provides a custom data extraction remote function module that further extends Data Extractor with other useful business needs. Process Runner software is already designed to work with this custom function module.
Click Here for configuration settings prerequisites to implement Extended RFM/Join Condition.
Approach
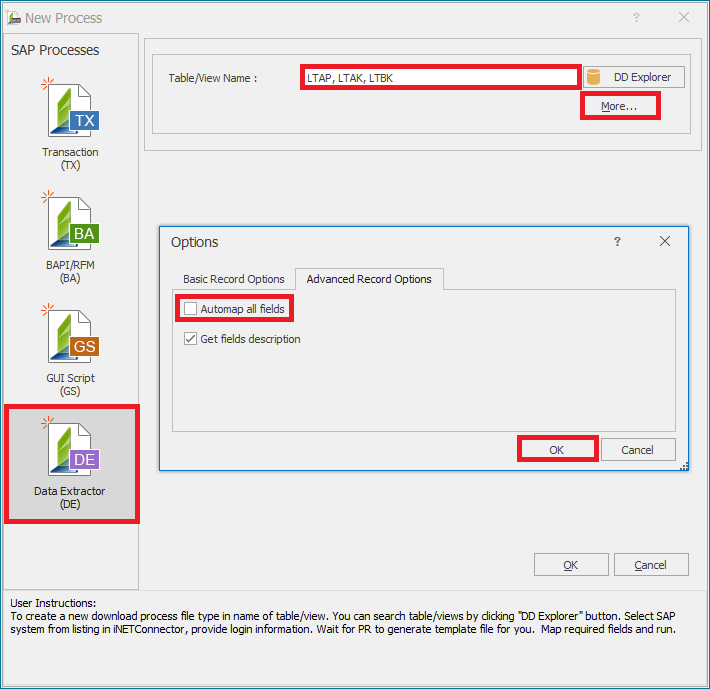
1.Start Process Runner and Launch 'New Process' wizard.
2.Select Data Extractor module and enter “LTAP, LTAK, LTBK” in the Table/View name text box and click OK. (When extracting from multiple Tables or Views, insert a comma between the Table/View names). Also, ensure you uncheck the ‘Automap all fields’ box for selecting the desired fields manually.
 Note |
|
When extracting from multiple Tables or Views, insert a comma between the Table/View names. Also, ensure you uncheck the ‘Automap all fields’ box for selecting the desired fields manually. |
|
|
3.Select the SAP system and enter logon credentials.
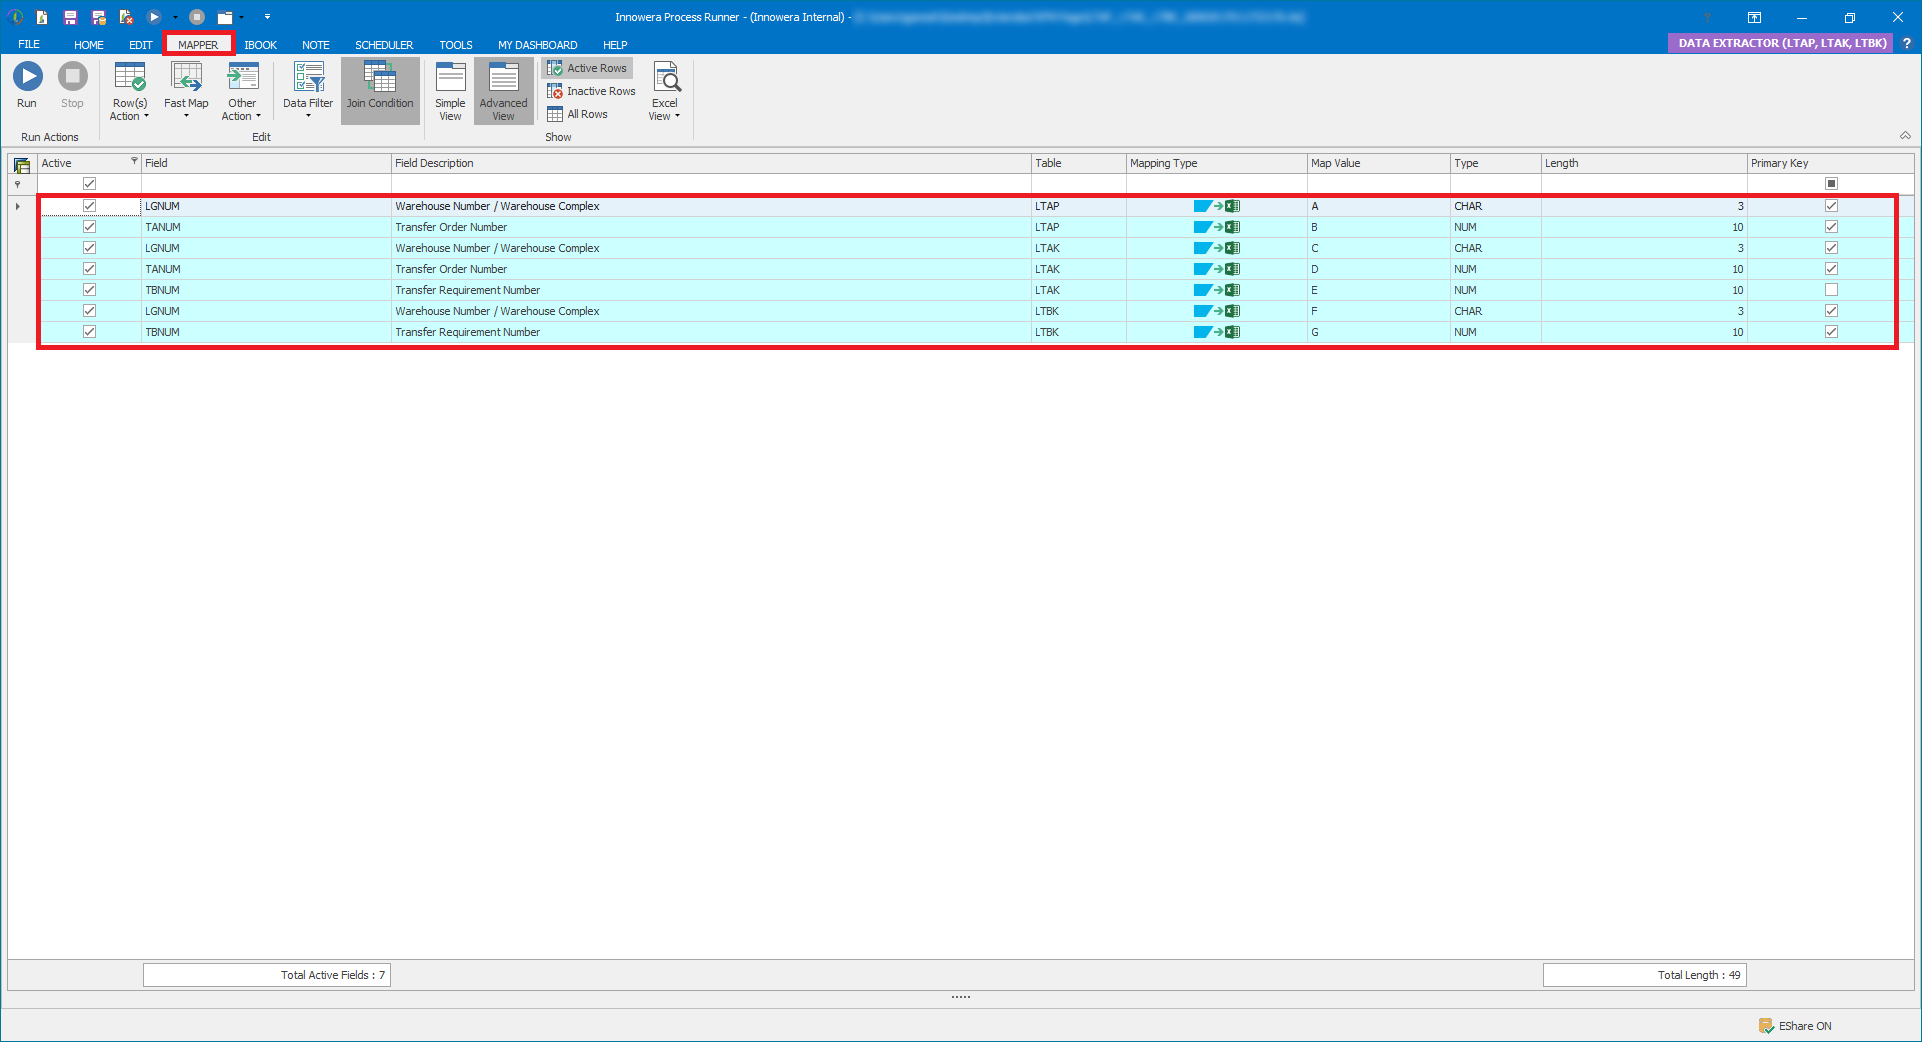
4.Go to the ‘Mapper’ tab and select all the fields required from all three tables. Map the fields to the Excel columns by hard coding the Map Values or using drag and drop.
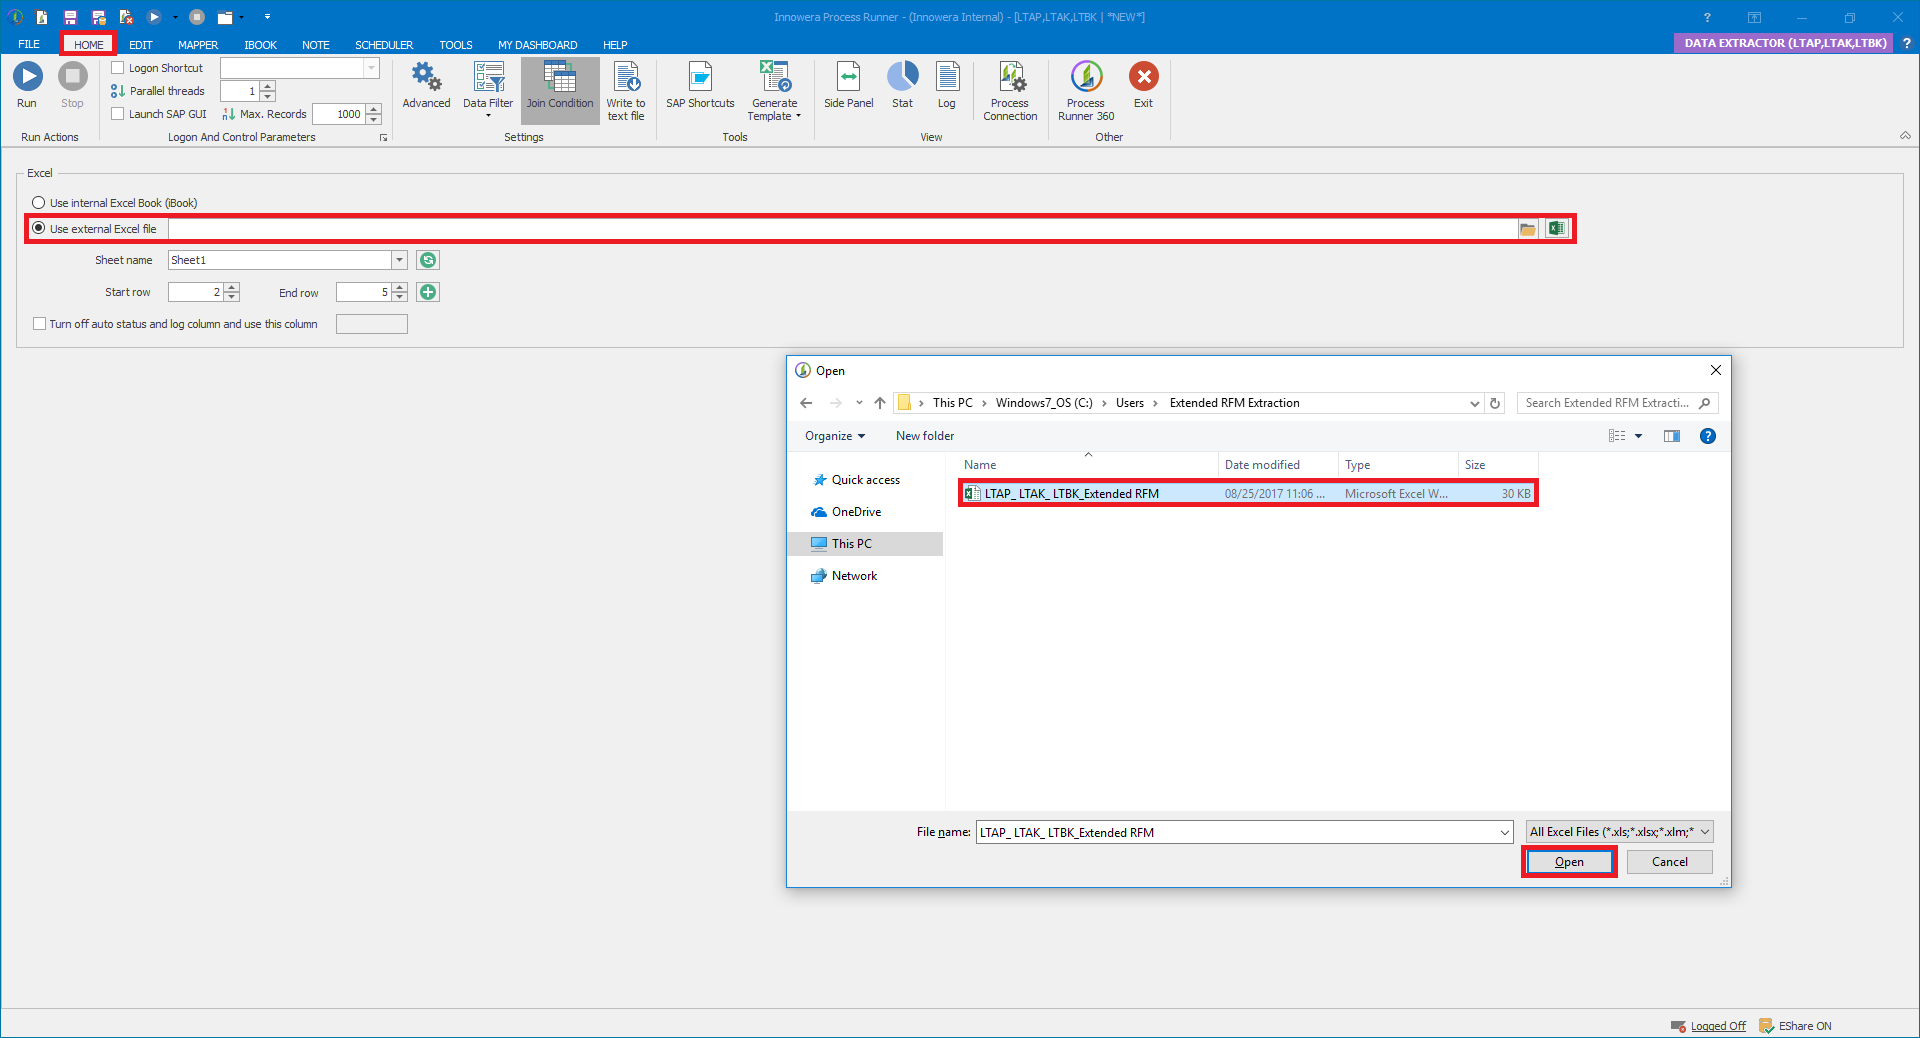
5.Go to Home tab and select any one option between Internal Excel Book or an External Excel File.
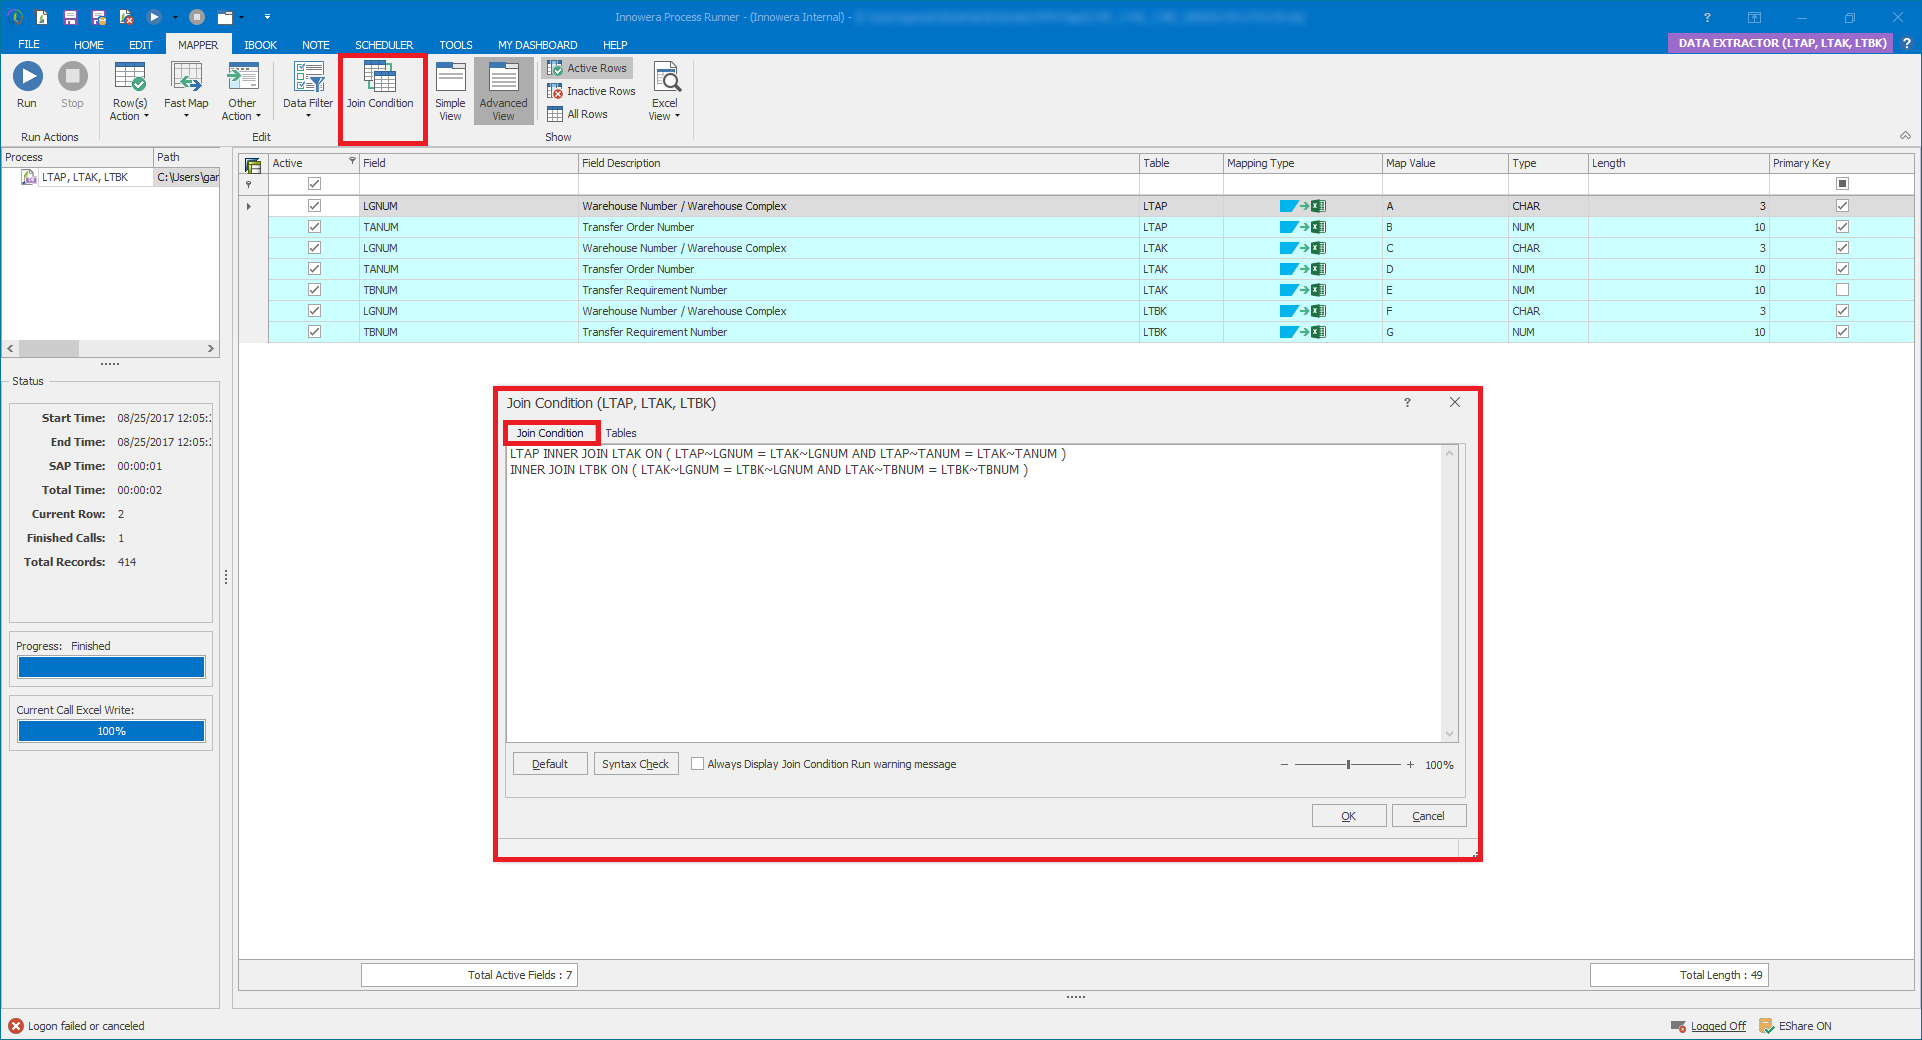
6.In the Home tab, click on Join Condition from the Settings group. The default Table Join Connection will be displayed at Join Condition tab of ABAP Join Table Condition.
In this case, the default join condition joins the Primary Keys of the three tables. However, the Transfer Requirement Number (TBNUM) from the LTAK table is not a Primary Key so it is not part of the default join condition.
Edit the default condition by adding the Transfer Requirement Number (TBNUM) to the Inner Join with the LTBK table tab as seen below.
•Click the ‘Default’ button to revert the ABAP Table Join Condition field to defaults if needed.
•Click the ‘Syntax Check’ button to check the Join Condition Syntax for any errors.
•‘Always Display Join Condition Run warning message’ will display a warning message regarding the join condition.
Default Join Condition
LTAP INNER JOIN LTAK ON ( LTAP~LGNUM = LTAK~LGNUM AND LTAP~TANUM = LTAK~TANUM ) INNER JOIN LTBK ON ( LTAP~LGNUM = LTBK~LGNUM )
|
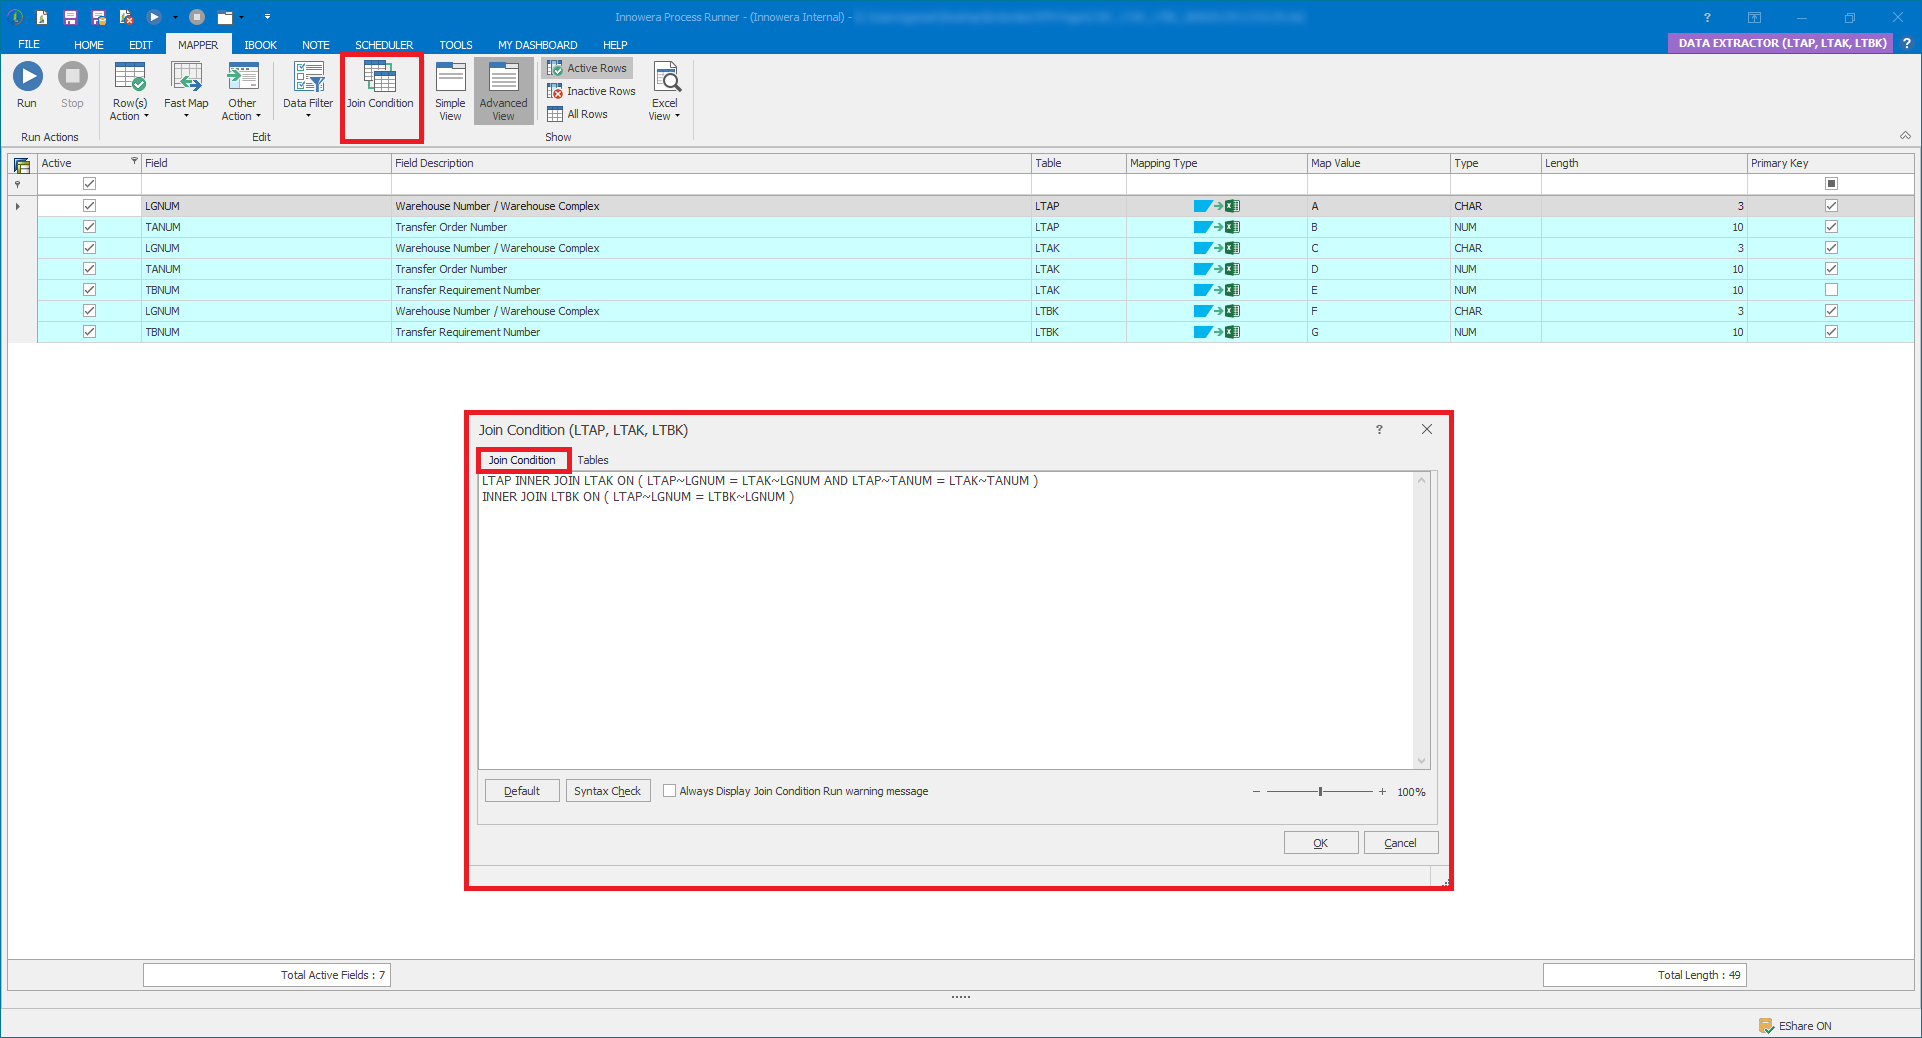
Modified Join Condition
LTAP INNER JOIN LTAK ON ( LTAP~LGNUM = LTAK~LGNUM AND LTAP~TANUM = LTAK~TANUM ) INNER JOIN LTBK ON ( LTAP~LGNUM = LTBK~LGNUM AND LTAK~TBNUM = LTBK~TBNUM )
|
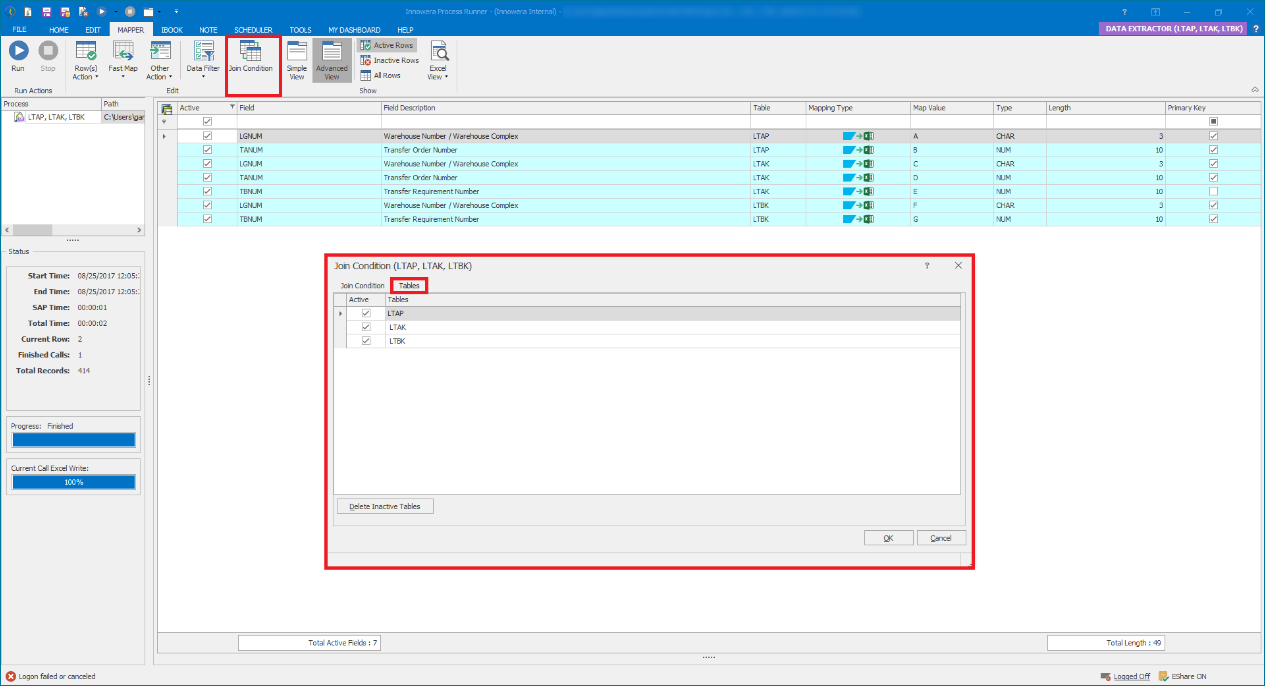
7.The Tables tab displays the name of the tables included in the Join Condition. ‘Active’ displays whether the corresponding table is active or not. Enable/Disable the check box to activate/deactivate the corresponding table. ‘Delete Inactive Tables’ option will delete the inactive table from the grid.
8.Click ‘OK’ and save the file.
9.Run the extraction by clicking ‘Run’.

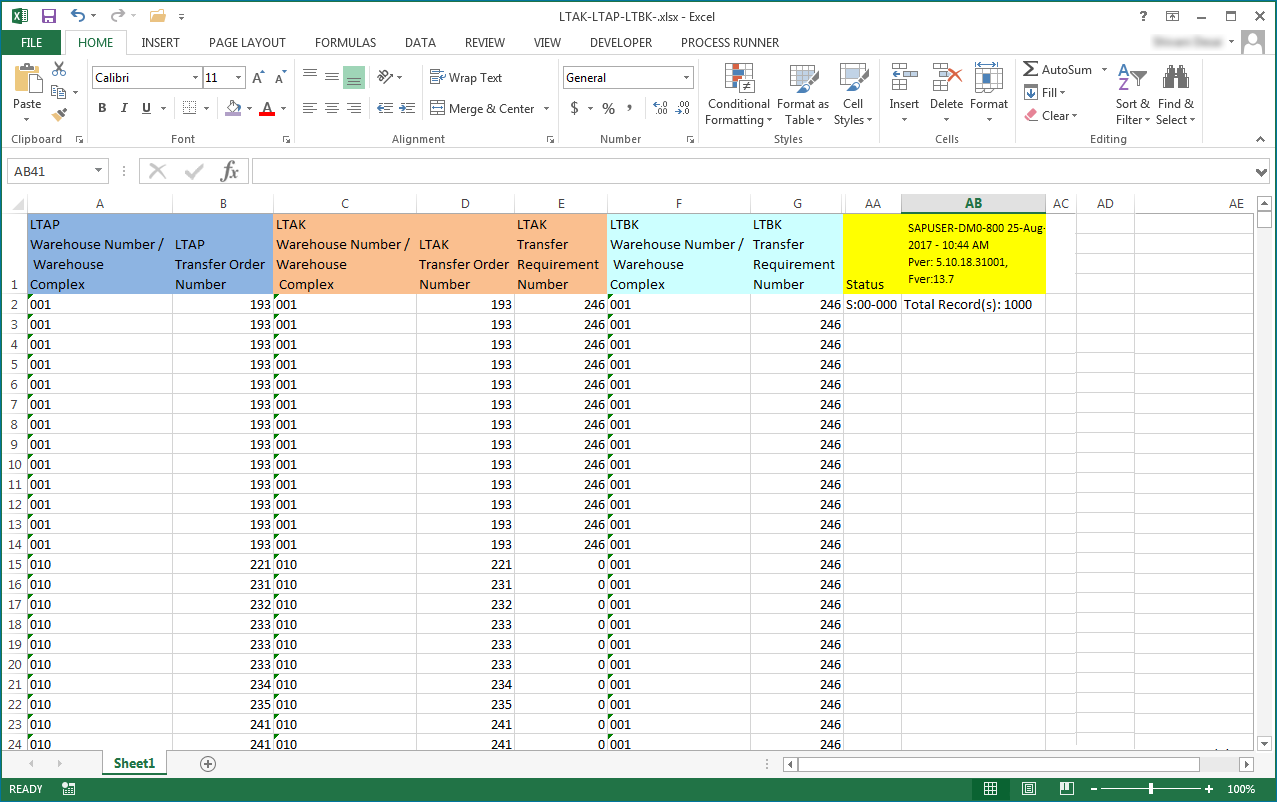
10. The results should look like the following: