Transaction
This topic describes how to record an SAP transaction flow using Process Runner. The file is saved as an .itf file (Innowera Transaction module File).
To create a Transaction Process file
- Select File > New Process > New Transaction or select Transaction (TX) available on the left side of the New Process window.
- In the Transaction Code box, enter the transaction code.
- To force Process Runner to run the transaction in batch input mode and to stop the transaction when it encounters COMMIT statement, select Run in batch input mode and Stop on COMMIT. When you do not select this option, the transaction runs in non-batch input mode (as you would run normally in SAP GUI) and forces Process Runner to continue the transaction even when it encounters COMMIT statement. Some of the transactions must be run in non-batch input mode.
- Optionally, select More... for additional recording options. The Options window is displayed.
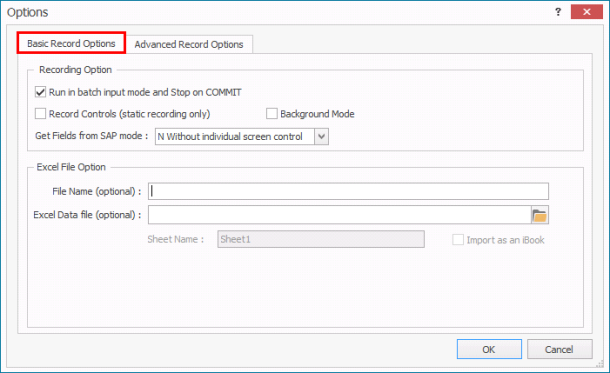
- On the Basic Record Options tab, enter the following details:
- Run in batch input mode and Stop on COMMIT: Allows transaction to run in non-batch input mode (as you would run normally in SAP GUI) and force Process Runner to continue the transaction even when it encounters COMMIT statement. Some of the transactions must be run in non-batch input mode.
- Record Controls (Static recording only): Allows Process Runner to record the SAP control framework objects, such as ALV grid or tree view, in static mode. You can run the transaction with such control but the input to these controls cannot be changed at runtime. Do not map and change any value that is sent to the control object as it is not effective and your recording might not work. Mapping to values outside of the control object should work as usual and you should perform mapping as required. We recommend that you use this option only when required or suggested by an expert or Magnitude support engineer.
- Background Mode: Runs the transaction in background simulation for successful run.
- File Name (optional): Adds the file name for the Process file before recording. If this field is left empty, then Process Runner automatically generates a name for the Process file.
- Excel Data file (optional): Indicates that an external Excel file that has data must be uploaded or downloaded to or from SAP. Provide the correct worksheet name of the selected Excel file.
Select OK. The changes to the options on the Basic Record Options tab are saved.
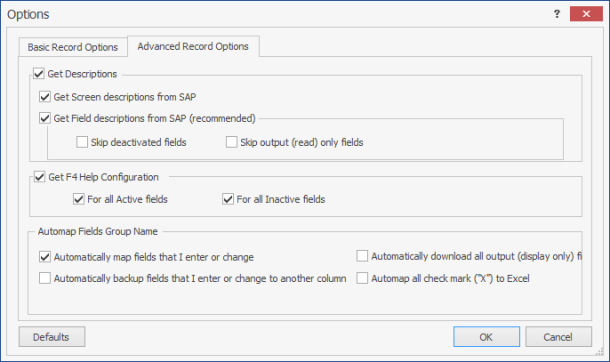
- On the Advanced Record Options tab, enter the following details:
- Get Screen descriptions from SAP: Retrieves the readable screen descriptions from SAP for all the screens were passed during recording. This requires special authorization in SAP; if users do not have required permission, then Process Runner displays a warning message and continue with generating file.
- Get Field descriptions from SAP(recommended): Allows Process Runner to get descriptive and more readable field information from SAP. If you select this checkbox, the recording might take a little longer, even though there is no impacts on how the transaction runs.
- For all Active Fields: Instructs Process Runner to automatically generate F4 Help for all the active fields.
- For all Inactive Fields: Instructs Process Runner to automatically generate F4 Help for all the inactive fields.
- Automatically map fields that I enter or change: Allows to automatically map input fields.
- Automatically download all output (display only) fields: Allows to automatically map the output fields. This option automatically enables and assigns Excel column IDs for the output fields found in the recording.
- Automatically backup fields that I enter or change to another column: Automatically downloads all the input fields; you can keep a record of what the values were before the upload.
- Automap all check mark ("X") to Excel: Allows the recorded checkboxes to be automatically mapped to the Excel columns after the recording is completed.
- Select OK. The changes to the options on the Advanced Record Options tab are saved.
- On the Basic Record Options tab, enter the following details:
- Select Start Recording. The Magnitude Connector for SAP window is displayed. For information about how to record different types of transactions, see the tutorials in the Transaction section.