Email Configuration
This topic describes how to configure the email settings to send an automated email from the task scheduler.
To configure email settings
- In Process Runner, on the Scheduler tab, select Email Configuration. The Email Configuration dialog box is displayed.
- To configure email settings, on the Email Settings tab, in the Account type list, select one of the following options:
- SMTP
- Microsoft Exchange
- Office 365
- To configure SMTP Server settings, enter the following details:
- Outbound SMTP Server: Indicates the SMTP server name that sends the email.
- Server Port: Indicates the port number to connect to the SMTP server. The server works with port 25 and 587.
- This Server requires an encrypted connection: Indicates that the email is encrypted when sent to the SMTP server.
- Email Address: Indicates the email address used to send and receive scheduled job notifications.
- Password: Indicates the password configured email address.
- For Microsoft Exchange or Office 365, enter email address and password from which the scheduled job notifications must be sent, and select Option. The More Settings window is displayed.
- Select one of the following authentication options:
- Use Standard Method
- Use OAuth Method
- If you select Use Standard Method, perform the following tasks:
- In Setting Mode, select Auto or Manual depending on whether you have information about the server URL.
- Optionally, in Exchange Version, select the version of your Exchange Server.
- In User Name, enter the user name associated with the email address from which the scheduled jobs must be sent.
- In Domain, enter the domain name associated with the email address.
- Only for Manual setting mode, in Server URL, enter the Exchange Server URL from where Process Runner autodiscovers the email ID.
- Clear Use Email Address for Exchange Connection if you face the “401 Authorization” error.
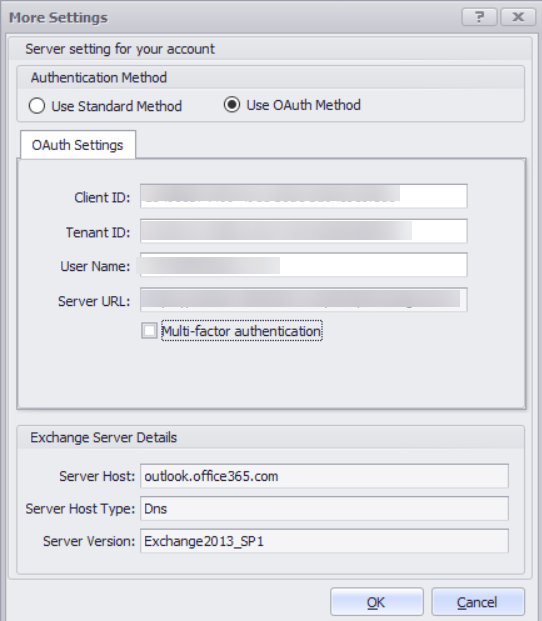
- If you select Use OAuth method, perform the following tasks:
- Enter the details in the Client ID and Tenant ID boxes. For information about how to use OAuth authentication in Exchange Server, see Microsoft documentation.
- In User Name, enter the user name associated with the email address.
- If your organization has enabled multi-factor authentication, select Multi-factor authentication. Mutli-factor authentication is enabled for the email account.
- Select OK. The window is closed.
- Select one of the following authentication options:
- Select Test. The email configuration is verified.
- Optionally, to send a test email, select Yes, and then select OK to exit the Success dialog box.
- To configure receiver settings, on the Receiver tab, enter the following:
- To Email: Indicates the email address of associated user who receives the status and error logs.
- CC Email: Indicates the email address of the user whom you want to CC the status and error logs.
- BCC Email: Indicates the email address of the user whom you want to BCC the status and error logs.
- To configure advanced settings, on the Advanced Setting tab, perform the following steps:
- Application Log for Connection: Indicates that a trace file is generated on the desktop with the logs for scheduled jobs.
- Connection Timeout: Indicates the time duration for the application to wait while trying to send email.
- Select Save. The changes are saved.
- Select Close. The Email Configuration dialog box is closed.